Kayakkev

Archive for the ‘Wood Kayak’ Category

Man survives gator attack crushed by falling tree

In Kayak Trips, Kayaking, Spring Run on August 29, 2010 at 11:37 am

A couple of weeks ago I went out with a local outfitter (Darry Jackson of Bill Jacksons) to scope out  a little known spring along the Chaz River.  I fell in love with this paddle!!!   There is a house on this spring that I can only describe as a $20 million dollar fishing shack.

Well a week or so later… a friend who is new to paddling wanted to go check it out.  So we took off work on a thursday and a friend of Scotts came along.  When I asked if he ever paddled, I was told he did a lot of canoeing.  Knowing I can get anyone back in thier yaks if something happens, I felt okay about this trip.  After all, weekday paddle means little to no boat traffic  and the Chaz is a slow moving river. 

 My only concern is that it is a 10 mile plus paddle  and can these guys make it, so I took a tow rope just in case.

We arrived at the launch at 8am, and I put Scott in my Atlantis Titan which he has paddled before, his friend Josh in my Manitou 14, and I took my recently finished Spring Run. 

Once the yaks were loaded with water, snacks, and assorted stuff one may want, we hit the water.  I suggested that we hit the new spring first, and then if everyone had energy, we would go play in the more well known springs.  So off we went.  I tried showing Josh how to use his paddle and get him to quit using canoe strokes,

 but old habits are hard to break as I am sure we all know.

Along the way to Crawford Creek (the turn off for the spring) we managed to see lots of wildlife.  A Bald Eagle flew over us and landed in a tree close by

A gator was swimming across the river when we came along beside him ( a good 35-40 yards away, and it turned and swam with us.  When the guys got nervous I explained he was just currious and would leave soon which he turn again and headed off to the other side of the river

And of course the usual water fowl.  Egrets, Comorrants, Herons

Once you leave the park, you see a few houses on the water.  Some are fixer uppers

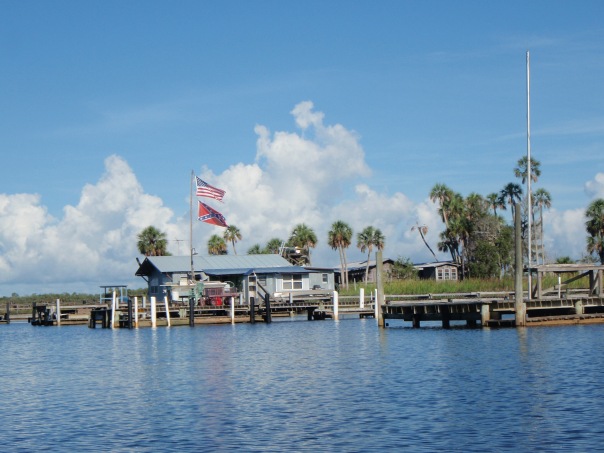
And some showing off some Southern Pride

And even some that floated

After about going 3 miles downstream, we turned on to “Crawford Creek” which is a river unto itself.  Very wide with houses for about the first mile.

It does not take long till you are secluded with the Wildlife again

The creek narrows quite a bit and has a lot of Old Growth foliage which is always unusual

and pretty flowers….

Now both times in this area someone has said that thier butt was getting cold, and when you look down you see crystal clear water about 6 feet deep.  It is wild that you can feel the water temp of 88 degrees turn so quickly from the springs to 72 degrees.

and before long (about 2 miles from where you turned on to the creek) you arrive

BEETEE JAY SPRINGS!!!!!!  And a fishing shack to rival ALL fishing shacks

The actual spring is right below the walkway which leads to a round house

At that point is where you turn around and head back

On the way back, the boys decided they wanted to stop and swim in the cold water.  And as they screamed from the cold water and the fact that I really dont like being in the water, I decided to sit in my yak and watch a really cool looking spider make a web right over my yak.  This spider was small and his body and tips of his legs were black, but the rest of his legs were bright red.  So once the guys lips turned blue, they decided to climb back in and paddle home.  I knew Josh was getting tired because he was not as talkative as he had been all morning.

So once we got past the houses we past coming in, the shore line was tall reed grass.  I was staying back with Josh as Scott was up ahead.  So I paddled up next to Scott while we waited on Josh to catch up.  Now here I am with my paddle resting at the front of my combing as I am slouching back resting and BSing with Scott when I see his yak go straight up with a long 8-9 inch high wave striking out from under him both sides.  As the wave is hitting my boat I scream GAAA… when I feel a very strong thump strike the bottom of my kayak, and find myself upside down in the water. Knowing that we just spooked a VERY LARGE gator.  I was lucky to of had time to grab my paddle, but no time to sit upright for a brace, so I figured I would just roll back up… hahahaha the water was only about 2 1/2 foot deep and I find my head, shoulders and upper back laying on a hard bottom.  After trying 3 times to hip snap my yak back in place and realising one cannot do this while their upper body is laying on the ground, I just popped my skirt and came up for air.  What the hell, if he didn’t bite me by then I felt somewhat safe.  So as I am standing in the water laughing and rolling my yak back over the guys asked how I was going to get back into my kayak.  HAhahahaha, that is when I realised I was the only one that knew how to do an assisted rescue.  So I got Josh to hold my yak while I stepped back into it and started pumping the water out.  As we are laughing and screaming about how scarey that really was, Scott asked me why I didn’t empty the water out of my boat while I was still out of it instead of pumping it?  I quickly informed him that even though I was not worried about the gator we spooked being there, that didn’t mean he wouldn’t come back pissed, and the fact that we were only a couple of feet from the reed line where gators are known to hang out plus where there are big ones there are little ones… I wanted the HELL OUTA THAT WATER!!!!  So needless to say on our way back up the Chaz, we pretty much stayed in the middle of the river.  But I can now say I have been swimming with a gator. LOL

As we are headed back up stream and discussing how tired everyone was and if we wanted to go back the the launch and grab a bite to eat or go play at one of the more popular spring known as “Maggies” or the “Crack”.  We are about 70 yards from the shore line on a flat water river that has no boat traffic, and no one is around when we hear a loud bang that sounded like a gun shot and then lots of cracking and right beside us a 60 foot tree just fell over.  We all just looked at one another and decided that it was time to head home.  I am not sure if we were the luckest people on the face of the earth, or if we just used all of our luck up…

Life Lately

In Boobie, Expedition Single, Guillemot L, kayak, Redfish King, Spring Run, Wood Kayak on August 12, 2010 at 3:48 am

8/28/10  Okay, I will admitt that I have been working but I have also been paddling my new yak (Spring Run) as much as I can and have not worked on the new boat.  But I sure do love how the SR handles!!!  I just can’t seem to get enough of it, even the gator attack didn’t slow me down. LOL

Well sorry to say that I have not moved much with the Boobie.  I just got home tonight from giving a presentation to one of the local Woodworker Clubs ( The Florida Westcoast Woodworkers Club ) on how to build strippers.  HSN has had me working 12 hours a day 7 days a week for the last 6 weeks, and I was just hired by a new company to do what I do… Construction!!!  After 2 1/2 years of looking I finally found a job that is suited for me.  We have also been doing our fair share of camping this summer with one more trip out before I start my new job.

One of the things I have been emailed about lately is pictures of my yaks.  I did not realise that not everyone knew what to look for when searching my posts.  So here I will post the pics with the names, and if you want to see how I built them you can go on to that post

My 1st Expedition Single

My 2nd Guillemot L another Nick Schade yak from CLC

My 3rd Redfish King

My 4th Redfish Spring Run L

With my next being “The Boobie” and I am thinking a canoe after that with a sailboat coming at some point.

The Boobie (part 2 it has started)

In Boobie, kayak, Wood Kayak on June 28, 2010 at 12:54 am

 8/31/10  Not much more is done, started anchoring the forms inline on the strongback.  In the pics, the ones that have tape on them are set, but it is going well.  Now I am going camping/kayaking for a week, but stay tuned, I shall return.

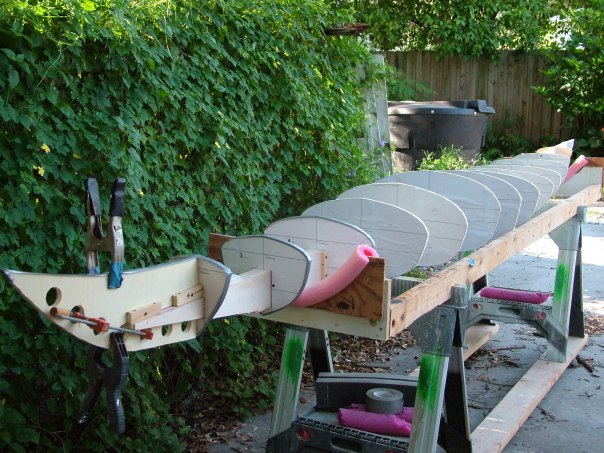
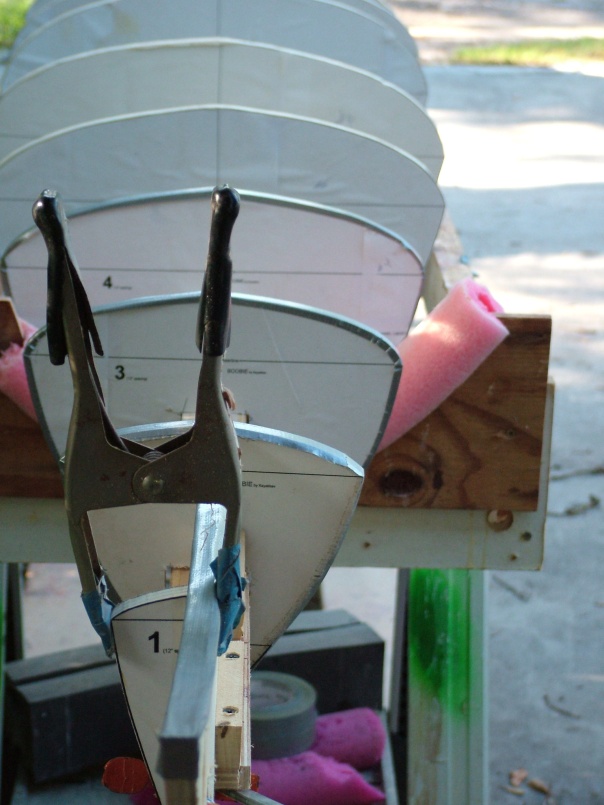
08/29/10  As promised here are the pics of the start.  Here you see the clamp holes on the bow form

The stern form placed in the strong back

and the form sitting on the strong back

So before I can start stripping, I have to secure the forms in line and tape the edges.

08/28/10  GOOD LORD!!!  Where has the time gone???  I actually worked on the Boobie a little today.  I drilled all my clamp holes in the Bow & Stern forms, cut out the centers for the strong back, and started placing the forms.  I will show pics soon I promise.  I had to quit working on it so I could go play today.

06/28/10  Well I now have all my forms printed out and glued to some 1/2″ plywood I pulled from the dumpster at work.  And tonight I started cutting out forms.

I have a few design ideas, but once again I am building this yak at little to no cost to me.  I have decided to work the deck first on this one so that I can do it with out staples, keeping it clean.  And then I will use staples for ease of construction on the hull.  Most of the wood is going to be Mahogany and White Cedar because that is what I have the most of.  So stay tuned to see how this yak turns out.

Spring Run (part 6 finishing a yak)

In Spring Run, Wood Kayak on June 6, 2010 at 4:35 pm

6/23/10 For now the pics show it on the water

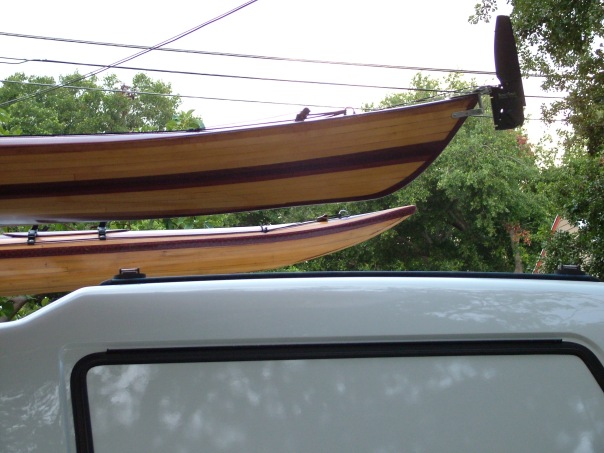
6/22/10  The yak is loaded on the truck along with the Guillemot that I built.  Boy are they way different in shape from the bow to the stern.

And don’t they both look good on the truck

6/21/10  Tonight I hooked up the rudder, installed my foam, secured the seat, and ran my deck lines and handles.  It is going to hit the water Wed after work as long as the weather holds out.

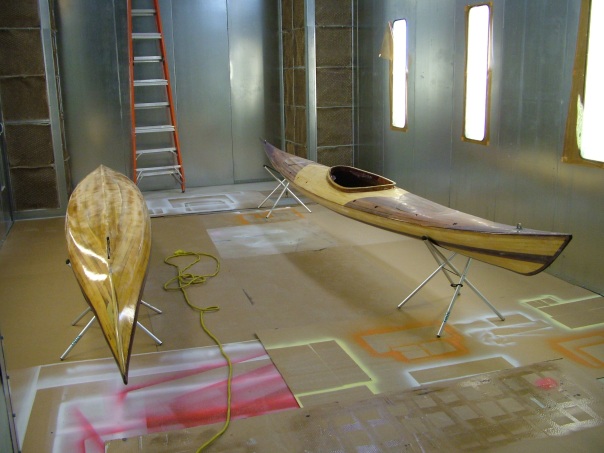
6/20/10  Well I was very lucky and was able to use a “Paint Booth” this weekend.  And it was nice.  I also tried out a new Air Sander from Mirka.  What a dream!  The yak is getting closer and closer to hitting the water.

While I was sanding mine down with 320 grit paper, I decided to go ahead and do repairs to Peggy’s yak.

And now that they are sanded and in the booth,

it is time to start spraying…

All that is left is the rudder, seat and deck lines.  Looks like a Wed Launch to me!!!!

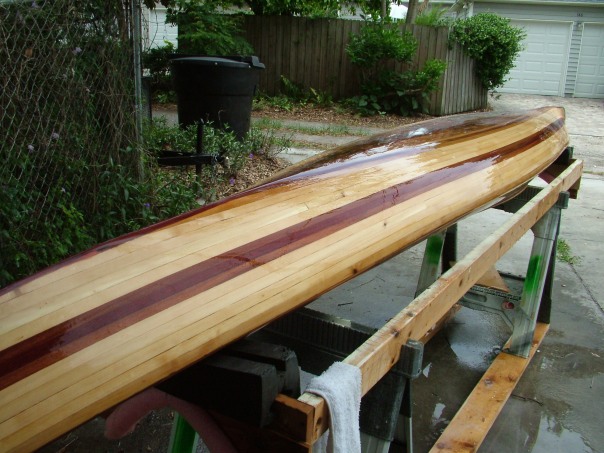
Here are a couple of pics of the whole yak while it is sitting on the stand, It is hard to see the colors till I get it on the water

6/17/10  Flipped and coated

I just love the combing

6/13/10  FINALLY!!!!  The epoxy wet sanding is done.

And now it is time to start the varnish coats.  I am going to put 5 coats on with a 4″ foam mini roller, and then sand smooth and spray my final 2 coats.  I will work on the hull for the next 5 days (5 coats) and then flip her over to do the 5 coats on the deck.

She is looking good, from a distance anyway. LOL

6/07/10  Well I decided this was a good place to start my final chapter on building this yak.  I am wet sanding the epoxy getting it ready for the varnish.  I  only have one way of doing this and that is by hand.  After 2 days I feel like my arms are going to fall off, but the deck and combing are done and about a 4th of the hull.

The slurry builds quick and you have to keep it washed off.  The nice thing about washing it off is that you get to see what it will look like with the varnish

Spring Run (part 5 making a yak)

In Spring Run, Wood Kayak on April 26, 2010 at 10:19 pm

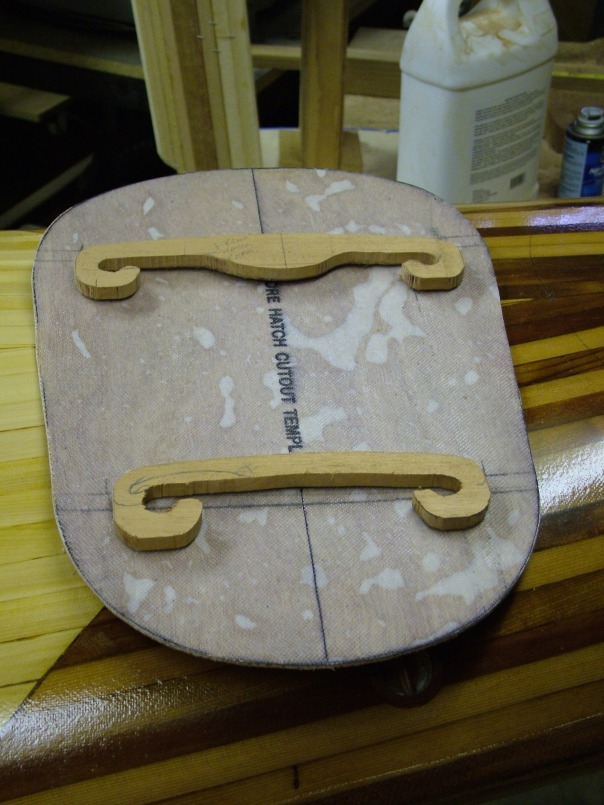
6/5/10  I have finished with my epoxy … I think.  Tonight I started wet sanding the deck to get it ready for varnish.  I also completed my hatches with adding the hold down cords on the inside and the neoprene gasket on the lips.  These seem to be the best fitting hatches to date.  Hopefully I will finish sanding this weekend and start the varnish next week.

6/01/10  I’m on a run now!!!  Tonight after work I flipped the yak over and started sanding down the hull.  I ended up having way to many runs from doing the deck, so I taped the deck off and started with a fresh coat of epoxy.  I am going to have to add 2 coats and then try and sand it smooth again.  I was a little worried about digging into the cloth, so I will thicken the whole hull and then sand it smooth.

5/31/10  I guess it has been awhile since I posted anything, but at least this time I have managed to get a few things done.  Since my last post I did seam the inside of the yak and I cut out my hatches so I could reach inside to do the seaming.  I didn’t take pics of it because it really isn’t anything to see.  Now with that done, I got busy with other things.  The first being installing the hatch rims and making the drain grooves

I added a fillet of wood flour to the underside of the cockpit rim, sanded it all smooth and then cut out my thigh braces that I made earlier and attached them to the combing

And as you can see in the pics, I installed my footbraces.  I did this because it is easier to install them before I mount the front bulkhead.  What can I say, I am too old and fat to crawl inside the kayak to get to the front bolts when I can reach them from the front hatch.

And seeing as how I had to make the front one and install, might as well do the rear one as well

All the holes for the seat have been drilled and refilled.  And while I was using the fillet glue on the bulkheads, I glued the hatch hold down brackets in place

And I have ended this weekend with sanding the deck and applying the final coat of epoxy.

After I work the hull, then I will wet sand the entire yak and varnish it.

5/12/10  Today I leave for 5 days of camping and Paddling in Central Florida.  So I wont have any new postings for a little while but stay tuned to see what I have to say about this years Poker Run.

5/11/10  I started cutting out the hold downs for the hatches since I decided to not use external webbing.  I liked the way it worked on the “King” that I built.

and I also discovered that the P&H seat I was planning to use wont work because it doesn’t fit.  But Lucky Me!!!  I have a brand new 6 point deluxe seat out of a Wilderness Tempest 18 Pro that fits PERFECT!

And the colors of the woods I used are starting to show thier flair.

5/09/10  I started wrapping the combing with the 1/4 X 1/4 inch rips of Ash to create the lip

And as you can see it takes a whole lot of clamps

5/02/10  Well, I have been a little frustrated with this build the last couple of days and just been thinking about it.  When I glued the two halves together, I must of unclamped it to soon because the port side let go leaving a mess.  So I decided to cut away the mess the best I could and tape the starboard side with 6oz glass tape (I did that last night).  I also placed my serial numbers on the yak while I was taping it.  I think I am the only builder that puts a serial number on my yaks, but it seems to make sense to me?

  Getting up at 6 AM this morning I quickly reglued and clamped the port side back where it belongs.  I wont be removing these clamps for two days. HAhahaha  Well with that all clamped up, I decided to start installing the combing.  I ended up cutting off the cheek plates because I am going to use a seat from a P&H kayak, and with it being a full system, I reduced the size of the back plate.  After I scribed the recess on to the side of the combing I scribed another line 1 1/2″ above and removed it.  Then I placed it in the hole and taped the underside edge so it was flush with the inside of the yak, and around the ouside so I can keep my fillet nice and clean.

As you can tell from the swoops of the profile, I am glad I made this 4″ tall on the form.  I went from one edge to the other to fit this yak.

And with things going so well this morning, I decided to lay out the rudder I am using on this yak

So with the pintle screwed in place and the cable housings set, I can do the drill, fill, drill. and now have to remove everything.

4/28/10  Today I spent helping Don Thompson of “Big D’s Kayaking” build a pergola on his back porch giving him shade and shelter while working on yaks.  It was a long day and another day of ignoring the yak.

4/27/10  After working all day I went to the St. Petersburg Woodworkers Guild to do a presentation on how to build a Strip Kayak, so not much got done on the yak today

4/26/10  Well today is the start of it coming together.  I have joined the deck to the hull.  I am doing something different this time, I am glueing up the outside first.  From this point on it will be a lot of sanding and epoxy.

I also worked on glassing the hatch rims and bulkhead plywood and then had to stop so I could make a mock up of kayak for a presentation for a local woodworkers guild.  I am showing how to hull with staples, and the deck stapleless.

Spring Run (part 4 finishing the deck)

In Spring Run, Wood Kayak on April 20, 2010 at 11:16 pm

4/24/10  I had a safety meeting this morning for the St. Anthony’s Triathalon and didn’t get started till noon.  So I laid out my deck line recesses and the u-bolts on the ends.  I drilled an oversized hole for the U-bolts so that I can fill them with epoxy and drill them again.  The ol’ drill, fill, drill method.

And then I drilled the holes for the recesses, and filed each cup down for a custom fit on the inside.

I used Mahogany cups on the dark wood,  and Ash cups on the light wood.

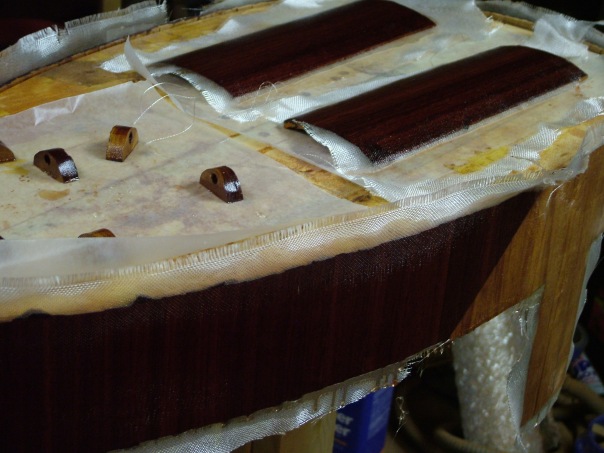
With the deck upside down, I glued each recess in by coating the entire cup in epoxy.  While waiting on the deck to dry, I laid out my foot brace bolts on the inside of the hull and glued them in place with fibreglass reinforcement.  The bolts are covered in blue tape to keep the epoxy off the threads

4/23/10  Well it was epoxy day today.  First I finished sanding the top deck, and then laid out the glass cloth

then I proceeded to wet it out with epoxy

after I got the first coat of epoxy on, I mixed up some more epoxy and using the scrap cloth proceeded to glass a 2′ X 4′ piece of 1/8″ plywood to use as bulkheads later.  I will have to do another one to make my hatch rims.

and finished the last of the glassing on my combing as well as the final coat of epoxy on the thigh braces.

By then the deck was dry enough to lay a second coat of epoxy on the deck.  With that done it was time to put everything up for the day.  That was when I realised I have a garage full of boat!!!

The only thing I didn’t get done was the final coat of the inside hull, but tomorrow is another day, and I was ready to go out for a paddle.

4/22/10  No pics tonight, all I did was sand.  The combing, thigh braces, and inside hull are all sanded and ready for the final coat of epoxy.  The top of the deck is 1/2 sanded.  So tomorrow I will finish sanding the deck, and glass it.  Then put my final coat of epoxy on everything else.  I will have pics then.

4/21/10  I know it has been months since I have done any work on the yak, but if you read the other posts you will see why.  The day after I got back from Charleston, I started working on her again.  I laid my glass on the underside of the deck, and recoated my combing.  Today I added the second coat of epoxy to the deck and sanded the inside of the combing getting it ready for glass.

3/25/10   Just spent a few minutes sanding the fill coat on the underside of the deck.

2/7/10  It was a busy day today.  I mixed up some cab-o-sil and epoxy to put on a seal coat on the underside of the deck.  You can see the lights I am using for heat in my shop.  It is in the 60s here in FL… we think it is COLD!!!

Although most of this will be sanded off, it still fills all the voids to make a smooth surface for the glass to lay on.

Then I glassed my combing wall, and thigh braces plus epoxied the holders for my shock cord on the hatch hold downs.

2/4/10    Okay, now once again I feel like I am getting somewhere.  The cockpit recess is all glued up, as well the combing wall.

So tomorrow I hope to finish my exterior sanding and maybe even start glassing the yak.

1/31/10  It has been a couple of days since I posted anything, and it may be a while for the next one, looks like I have work this week. LOL  How ever this week I have been continuing my work on the recess which is almost done

And I did what I call a seal/putty coat over the entire yak and started my faring sanding

Plus I continue my work on the cockpit rim, it is all glued up and I will start sanding it now so that I can start glassing the outside.  You will notice the style matches the deck.  Sad thing is no one will see it when I have my skirt on because only the inside of this will be seen. LOL

1/25/10  As my last post said… I have been working on the cockpit recess and the combing.  It is slow going and if anyone out there has a faster easier way, PLEASE let me know

And I continue to work on the combing…

Spring Run (part 2 finishing the hull)

In kayak, Spring Run, Wood Kayak on February 4, 2010 at 1:45 am

2/7/10  I placed my second reinforcing layer of glass in the cockpit area, and glassed it in.  Now it is time to do the fill coats

2/5/10   I finally sanded the inside putty coat out of the hull, it has only been what? 4 months! LOL  But it is sanded and I laid out the glass

and then applied the epoxy.  Temps here in FL have been a little screwy, so I seem to be fighting a little outgassing, but I think I have that under control now

11/06/09   Well it is time to work on the inside of the Hull while I continue to work on stripping the deck.

DSCF2909

DSCF2910

After scraping and sanding the inside I mixed up some fillet compound (epoxy, woodflour, and Cab-o-sil) and put fillets in the stems.  This is not necessary, but is a trick I learned from my friends that make S&G yaks.  It makes it much easier to lay the inside cloth with no air pockets or wrinkles.

DSCF2914

And then I skimmed the entire inside with an epoxy putty to fill all voids for the same reason

DSCF2915

11/01/09  Well it is the beginning of November and the end of Daylight Savings Time.  I found a little energy to work on the yak today, got the shear strip pieces (which I had to staple/nail) secured to the forms and then stripped the deck and forms from the hull.

DSCF2900

The hull is already loose from the forms, and the gaps you see are from the spring back.

DSCF2902

And now the inside of the hull is ready to be scraped, planed, and sanded

DSCF2904

It is also time to start the next chapter of this build, as I will be working on the hull as well as the deck at the same time.

10/30/09   Here it is the end of the month and I haven’t posted anything.  I guess I might not make the Christmas deadline I set for myself.  The reasons I haven’t progressed are basic ones I guess.  The first one is that I am working now and by the time I get home it is dark and I am tired. LOL  2nd is that now is the best time to be kayaking and camping here in FL and I am trying to take advantage of it while I can.  So my free time has been spent playing instead of working on the yak.   3rd is I recently hurt my back and have not been able to do anything much less work on the yak, but thanks to Modern medicine (good drugs) I am getting better.  And the 4th reason is probably the biggest reason.  I am stumped with how to do what I want as far as the deck design goes.  The deck strips I need to start with are many little pieces that are cut at angles.  Trying to cut them to the right length, right angle, glue them together and wrap them around the curves of the forms has proved to be challenging at best when I am trying not to use staples.  I may have to give up on that and staple the first strip till I can get 2 strips mounted on both sides and use the Hot Melt glue gun to secure them to the forms so I can finish it with the “Doodads” 

10/05/09  The following pics are the of the second coat of epoxy while there was enough daylight to still take pics… barely.

DSCF2857

DSCF2858

This is the graphic I have settled on with changing the name to “Flyin'”.  That too is subject to change at any given moment. LOL

DSCF2856

10/04/09  Well, I got the hull all sanded and ready to glass.  I was going to go get my camera, then excitement got a hold of me and the next thing I know I am spreading glass on my yak!!!  Well, I can’t let bare glass just set there, so it was time to mix up some epoxy and start spreading.  As usual, I put an extra layer of 4 oz glass on the stems, and the center of the hull before covering the entire yak.

DSCF2851

 DSCF2852

The Padauk does not stand out as red as I hoped against the Mahogany or Dark Red Cedar as I had hoped.  But it is still pretty!  I only have after work for the next 2 weeks to work on the yak, having plans for the next 2 weekends.  Gee, I hope I can finish this yak by Christmas.

9/28/09  Can you tell what I have been doing lately???

DSCF2842

Yeppers!!!  I am planeing and Faring the hull.  Not a lot to see different, and I am not getting much done a night do to being busy working, but here are the latest pics.  Notice some of my favorite tools, they are not needed, but fun to use. LOL

DSCF2845

DSCF2846

DSCF2847

DSCF2849

Making a Combing (my way)

In Combing, Wood Kayak on January 29, 2010 at 4:53 am

In this post you will see pictures from several different builds.  That is because I didn’t think anyone else would be interested in how I do it.  So I have gathered the combing pics from different builds and will most likely end with the Spring run build.

Once I found the size that I like, which uses a “Seal Skirt” 1.7, I glued up some 1 X 6s edge to edge.

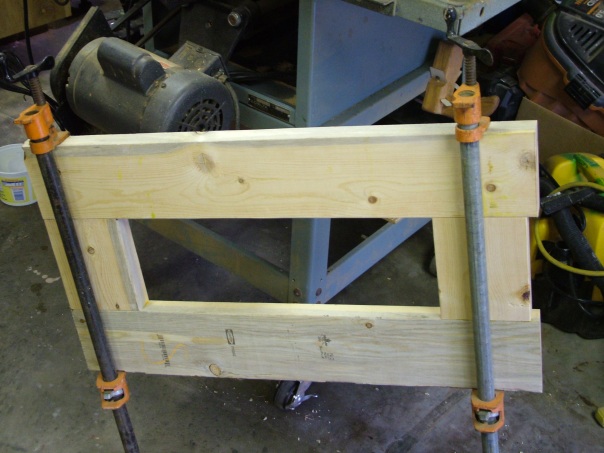
Then I made a frame to match

And a leg post out of 2 X 4s

Then I traced the first pattern to the frame

Then glued the 2 patterns together and mounted the post

Sanded the forms(patterns) so they matched each other, added some feet to the post and taped the forms

On my first 2 I stapled (nail) the strips to the pattern.  I cut my strips to 4″ in length except for the back and cheek plates which I make longer.  This makes installing the backband easier.

On the Spring Run, I am using rubber bands

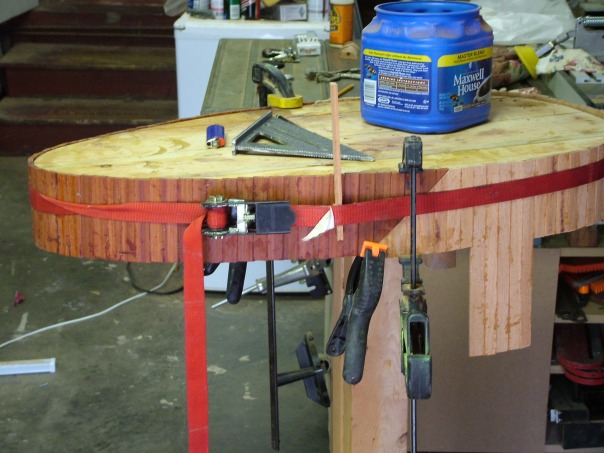
Meanwhile as I glue those pieces up, I cut12 – 12″ pieces of strips for my thigh braces.  I glue 6 pieces together and wrap them around a 5 gallon bucket (notice that the center is not glued together).

After the glue dries, I sand these smooth and then glass them

By now I have finished stripping the form which I sand and add 6 oz. glass tape to the outside

Once I have a couple of coats of epoxy on it, I remove it from the forms and lay it on the Kayak recess so I can scribe the lift of the recess.  If you look close at the next picture you can see the scribe line.

Once I have my line scribed, I rip some Ash to 1/4 X 3/8 inches and bend them around the coaming matching my scribe line.  I glue and clamp one piece of Ash at a time using LOTS of clamps.

Once I have a lip that is 3/4″ wide, I use a belt sander to clean the rim down even with the lip.

I coat both the lip and rim in epoxy and let dry.  Once it is dry I remove it from the forms and sand the inside.  Then using the same 6 oz. tape I epoxy the inside.

I mix up a little epoxy, silica, and wood flour placing a small fillet on the underside of the lip

With the recess cut-out to fit the rim tightly, I slide it in using a 1″ spacer between the recess and the underside of the lip.  Then using more fillet mixture I glue the outside of the rim to the recess.

When it is set, I turn the deck over and trim any excess hanging through and shaping the cheek plates and back plate.  Then add another fillet to the inside.

With the combing installed, I cut the thigh braces to shape and locate them to the combing.  Using 5 minute epoxy I glue them in place.  Then using a color match fillet mixture, I add a 1/2″ wide fillet all the way around the braces.  Sand smooth and apply a finish coat of epoxy.  Using contact cement I glue 1/4″ closed cell foam to the underside of the braces and the combing is complete.

Tools to build a Kayak

In Tools, Wood Kayak on January 28, 2010 at 6:21 pm

Below I will show and describe the tools I use to build my kayaks.  By NO means are these tools required, and most of them I owned before I took up this hobby.  In fact I owned all my big tools from either work or making the furniture in my house.  Also keep in mind that I only have a 2 car garage in which I have to keep the yak I am building and all of my tools.  So all of my tools are on casters so I can roll them outside to use them.

Large Power Tools

Table Saw… is what I use to cut my strips.  Mine is an old Delta Contractors saw which I added a Beismeyer fence and a router table on one end.  This is kind of a shop staple.

Bandsaw… again I have owned mine for more years than I care to remember.  Mostly used to make custom cuts like making forms, eyelets, cockpit recess fillers, etc.  It is a Delta 14″

Router tables… Hahahaha, I am so router rich it is scary.  My one is a Kreg table, with a Woodpecker lift, and a 3 1/2 hp Delta router that I use mostly to cut the cove in my strips.  Having a fancy lift in it makes it easy to set up.  I also will use it to cut out the recess of my skeg handles, do round overs on other assorted pieces.

The other most used is the one I have mounted to the extension of my table saw.  I mostly use this one for cutting the bead on my strips.  Having a delta 690 router, it is not as easy to adjust.

Drill Press… this is a fairly new tool to my shop, not for kayaks but to replace a cheap one that was not very accurate.  I chose a bench type for room and it does everything I ask of it.  I chose the Jet because of reviews and cost.

Thickness Planer…I have to say I do love what this tool does.  It is a DeWalt 13″ that allows me to keep all my strips uniform in thickness and when I buy my lumber Rough Sawn then it allows me to plane it down to the 3/4 or 5/8 strip width.  I also use it to size my combing lip strips and stem strips.  Needed?  No, just very handy

Wood Lathe…  I have used this tool once in building kayaks, and that was to turn carry handles.

Strip Sander… I use this to shape different things such as eyelets(faring), clean up angle cuts on my strips where they meet the stems of the recess fillers.  Very handy and a lot faster than a plane.  I use a very cheap Delta 1X30.


Hand Tools

Planes…  I have 4 that I use on my yaks and all 2 are low angle block planes.  2 of them are Stanley brand and what I use for the rough work.  They have a habit of dulling quickly hence why I have 2 of them.  The 3rd one I own cost a months pay and is my Baby. LOL  It is a “Veritas Low Angle” with the extra handle and knob.  It also has a much harder steel blade which does awesome finish work and stays sharp longer.  The draw back to this one is it takes more work to sharpen it.  The little one is a small Bullnose plane.  Don’t use often but is handy when you need it.

Spokeshaves…  I have so many different types of spokeshave I dont know where to start.  It almost seems like I started collecting them.  So I think as I take pictures of them, I will give a description.

The top one (red) is an Avanti flat sole standard shave.  Inexpensive but works well.  Next is my favorite standard shave.  It is a very old “Stanley Sweetheart” flat sole shave.  And the 3rd in this group is another Avanti, but it has a rounded sole.All spokeshaves take a little practise to figure out the right angle to hold, blade depth, and pressure which to use them but it is worth it.


 This second grouping are pretty much specialty shaves  Using the picture on the left I will start from top to bottom.  This unique tool is called a “Pull Shave”.  Its curved sole and handle placement make it perfect for planeing inside curves… like where the bow & stern widen out and the insides of the kayak.  Next is another baby of mine, it is a flat sole “Veritas” shave with a hardened blade.  Great for that final smoothing.  The skinny black one is also a “Veritas”, but it is a low angle spokeshave for those knarley grains.  And last is another “Stanley Sweetheart” convertible shave.  The blade sits in a barrel body which you rotate to adjust the amount of cut you want and as you can see between the 2 pictures, the handles can be moved from the sides (either making left or right hand) to the front.  For those that don’t know, Sweeheart planes were made in England and are of much finer quaility than the Stanleys made here in the USA.


Scrapers…  There are 2 types of scrapers.  The first being your basic painters type that I use to remove glue drips and such, and the 2nd type being a cabinet scraper that is used to scrape the raw wood to a super smooth finish

Japanese Pull Saws…  Not until I started making kayaks did I realise how far ahead the Japanese are ahead of us Americans when I comes to cutting tools.  All of their saws cut on the pull stroke which makes them accurate and fast.  There are many different types with each having their own purpose.  The most common and used has a rip set on one side and a crosscut on the other.

Shinto Rasp…  Another Japanese marvel.  I use these on both the raw wood as well as on the epoxy.  You use them the same places you would use any rasp, what is cool about these is that one side is rough quick cut and the other has a fine finish cut.

Faring Sanders… These are home-made.  Using a piece of 1/4″ plywood and covering one side with melamine (any laminate), I cut them to a width of 4 1/2″ and various lengths.  I glued a couple of wooden knobs on them (backside)  to use as handles and I use PSA sandpaper made for vibrating Sanders.  These really do work well.  They level out the surface of your yak so when you have that piano finish, you don’t see dips caused by other Sanders.  This is one of my “MUST HAVE” tools for kayak building.
Clamps… What can I say, never enough.  I use all kinds from spring clamps of various sizes, pipe, bar, vise grip type, and I guess the “Doodads” mentioned later would even fall into this category.

Doodads…  These marvelous little acrylic thingys are just what is needed if you want to build your yak without using staples.  I found them on the Blue Heron website where a man in Portugal with the user name of “Amlap”(Silverio) designed them to make surfboards & kayaks.  He shared his design with others and a man in Australia who goes by the name of “Seppy” (Rick) who has access to a laser cutter and made them for everyone who wanted a set (100 pcs.) at minimal cost.  I ordered my first set and found them working so well (see Spring Run) that I ordered a second set while he was still making them.

Small Power Tools

DA Sander

Drills

Screw Gun

Grinders/Sharpening

And The Most important in my shop

Is a good radio and a “Shop Dog”

Spring Run (part 3 begining the deck)

In Spring Run, Wood Kayak on January 20, 2010 at 1:43 pm

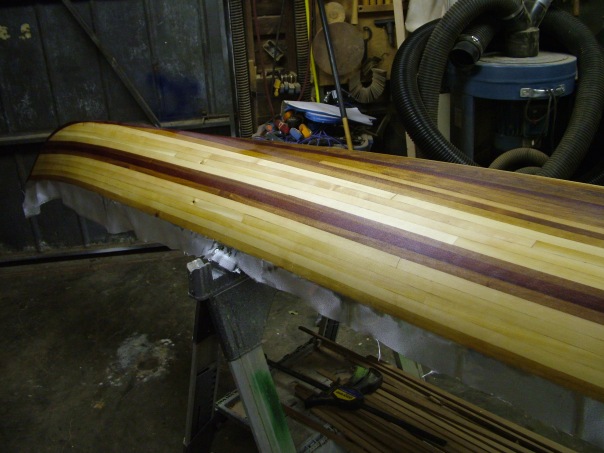
01/21/10  YAHOO!!!!  The deck is stripped out.   Now to start the cockpit recess.  Then I will putty and sand the whole thing.  This pic is looking down the bow

And the spots you see is this mornings rainwater dripping off the trees.  Here is the opposite view


 And now for the side view…


 And this next one shows the colors of the woods better

01/20/10  Okay, for those of you that follow my blog, you will notice certain words that are highlighted.  If you click on them, it will take you to a whole new web site that is connected to the name or event.  Might save you from a whole lot of Googling. LOL

Okay as I promised yesterday, I have a few pics to share.  As you can see, the front half of the deck is stripped out…

and I am on the home stretch on the back half

A little more White Cedar (aka AWC) and I will be doing my cockpit recess.

And speaking of the cockpit, I have started my combing

And as the combing progresses, I will start a separate article showing how I make mine.

01/19/10   Okay!  I know I have been slacking in my posts, but between being away for the holidays, then coming home to 2 weeks of lots of work, temperatures here in FL lower than they were in Denver CO., and my just getting things back in order, I just haven’t been working on the yak.  But I have a new goal now… my friend Russell Farrow of Sweetwater Kayaks is having his annual symposium at the end of feb and I am signed up to take 3 days of classes with Nigel Foster and how cool would it be to have this yak done in time????  I worked on it all day today and will post pics tomorrow.  I hope to get quite a jump on it by the weekend (some of us are discussing going kayak camping this weekend).

12/06/09  Just to let everyone know, the Turkey was PERFECT!  The weather was questionable however.  Now on to the build…

Again doing these little 2 foot pieces stapleless, it just does not seem to go very fast.  But here are the pics as to what I have to date.  I am now working with the WRC on the stern end, and still with the AWC on the bow end (actually the middle)

And overall

11/24/09  Well, the holidays are on us and I have come to realise there is no way it will be done by Christmas.  The weather has cooled down here in Florida and it is the perfect time for Kayaking, and camping.  And we will be starting this weekend with 4 days of fun.  I am already drooling with thoughts of our annual “Trash Can Turkey”

I haven’t been posting much because putting a couple of 2 foot strips at a time on the yak just doesn’t feel like I am going anywhere very fast.  So I will post pics of what I have done so far and let you decide. LOL  I am still not sure how this is going to look when it is done

This first pic was the bow when I last posted

This is how far I have gotten on the bow now

And looking at the bow from the center line

Working in confined quarters, I turned the yak around to start the stern.  Here I am with it, and yes it looks like the bow did a month ago.

And if you use your mind to stitch the next 2 pics you can see how the entire yak looks.  Yes I did it on my puter but it made the pic to smal to see anything in this post, so just use your mind…

11/06/09  I continue to glue up little strips while working on the hull at the same time

DSCF2912

As you can tell from the following pics, I have finished the bow point in Paduk with a Mahogany behind it, and am now working on the Dark Red Cedar.

DSCF2911

DSCF2916

11/01/09  As of today I am starting to strip my deck now, I think you can see from the pics what the basic design is going to be….

DSCF2905

DSCF2906

Although I had to staple/nail the first row on, I am happy to say that I am back to using my “Doodads” to secure the strips.

DSCF2907

DSCF2908

My biggest delima now is the fact I used a hot melt glue gun to set the shear strip and I am not sure how easy it will be to strip the forms when I am done. LOL    I also have to remember to re-tape the forms before I continue or I will have a real problem stripping the forms.